
Balloon Baseball is a fun game that works for any holiday. I did this game for a Valentine’s party for my preschool daughter. The long Balloons are the bats and the small balloons are the balls. I made the bases out of construction paper cut out in heart shapes. The children took turns being the pitcher and hitting the ball. They had a blast as they ran around the bases. This game is great because it can adapt to any holiday. Here are some variations:
St. Patrick’s Day just use green balloons and shamrock shaped bases.
Birthday’s use different colored balloons and balloon shaped bases.
End of the year party use balloons in school colors and apple shaped balloons.


Next, I cut around the shapes leaving a 2” border and punched holes about a 1 ½” apart. I used a shoelace as “thread”.

My daughter really enjoys sewing around her favorite characters.


To personalize use puff paints to write the child’s name on the front of the pocket.

This pretzel necklace is fun and easy to make!


crayola

For Christmas I decided to make my daughter sewing cards. First, I printed off some of her favorite characters from the free coloring pages that are all over the web. Next, I put in an old Christmas movie and colored in the pages. Then, I cut out the coloring pages and mounted them onto colorful cardstock. Instead of laminating I put clear contact paper on the front and back.


My daughter really enjoys sewing around her favorite characters.

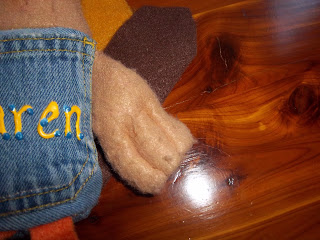
My sister made these fun Thanksgiving turkey’s from old blue jeans. She placed a few crayons in the pocket and set them on the table with a place mats the kids could color. To make the turkey she cut out the back pocket of kids blue jeans. Then cut out a turkey shaped head from brown felt and with right sides facing she attached it to the blue jeans. Do this step with the front and the back.

Next, again with brown felt she cut out four turkey wings. She sewed them with right sides together. Then turning them inside out she stuffed the wings and top stitched on the creases in the wings. Next, baste the wings to the right side of the jeans with a pocket.

For the legs she cut out different lengths of orange felt about ½ inch wide. She cut out four feet and again sewed them right sides together, turned and stuffed them and sewed the makings. She tied and knot in the legs to create knees. She then basted these right sides facing on the bottom front of the jeans with the pocket.

For the face she sewed on a beak and gobble and two bead eyes.

Cut a moon shape out of the brown felt. Out of different colored felt cut out feather shapes. Sew the feathers in alternating colors onto the moon shape of brown felt. Sew the the brown moon shaped felt with the feathers facing out on the blue jean without the pocket. Now with right sides facing sew the front and the back together make sure the feathers wings and legs are tucked in and you don’t snag them as you sew. Leave a small opening to turn the turkey inside out and stuff.

For the Hair simple sew on yarn with a needle using loop stitches.
If you want your feathers to stand up you can sew them with a tack stitch to the back of the blue jeans.

This pretzel necklace is fun and easy to make!

First you need shoelace licorice in any color you want and pretzels. Separate the licorice until you have just one string and tie an end to a pretzel.

Next loop the licorice through the next pretzel continue adding licorice and pretzels till you get the size of necklace you want.
Variations:
Red licorice is perfect for a heart valentine’s necklace
Green licorice works great for St Patrick’s Day
You can make this activity educational by having the kids count the pretzels as they add them to the necklace.

When my children wanted character cakes for their birthday, I couldn’t believe the prices the bakery charges. I knew I could make a similar cake for around five bucks.
Character Cakes are easier to make than you might think. I search the web for free coloring page sites with the character my kids want. For this Mario cake, I printed a coloring page and mounted it on cardboard and “colored” in the lines with frosting using a basic star tip. I didn’t let my kids eat the frosting off the Mario because of the ink, but they still enjoyed the cake and cupcakes.
For my son’s Star Wars Birthday, I again used a coloring page for my basic design idea. Using a straight tip I just drew on the design I had found online. Then, to top it off I added a few Star Wars toys. My kids love to pick out toys for the top of their cake and since they didn’t come from the bakery, they are higher quality and don’t break as easily.
| ||||||||||


I really didn’t want my three year old daughter to have a ton of frosting for her birthday. She gets really hyper with lots of sugar. I simply printed off the Strawberry Shortcake poster mounted it on clean cardboard and using a star tip created a border around the cake. She loved it and I didn’t have to deal with her wanting to lick all the frosting off the cake!

This diaper cake was made for a game at our sister’s baby shower. We had the guest guess how many diapers it took to make the cake. The prize was “Extra” gum, because the winner was “Extra” glad they did not have to change all the diapers! This cake is super easy to make.


This diaper cake was made for a game at our sister’s baby shower. We had the guest guess how many diapers it took to make the cake. The prize was “Extra” gum, because the winner was “Extra” glad they did not have to change all the diapers! This cake is super easy to make.
Supplies:
Pack of diapers (ours was 50 size one diapers.)
50 Small hair rubber bands
Two large rubber bands
One normal rubber band
Two cans different sizes with lids and one bottle.
Ribbon
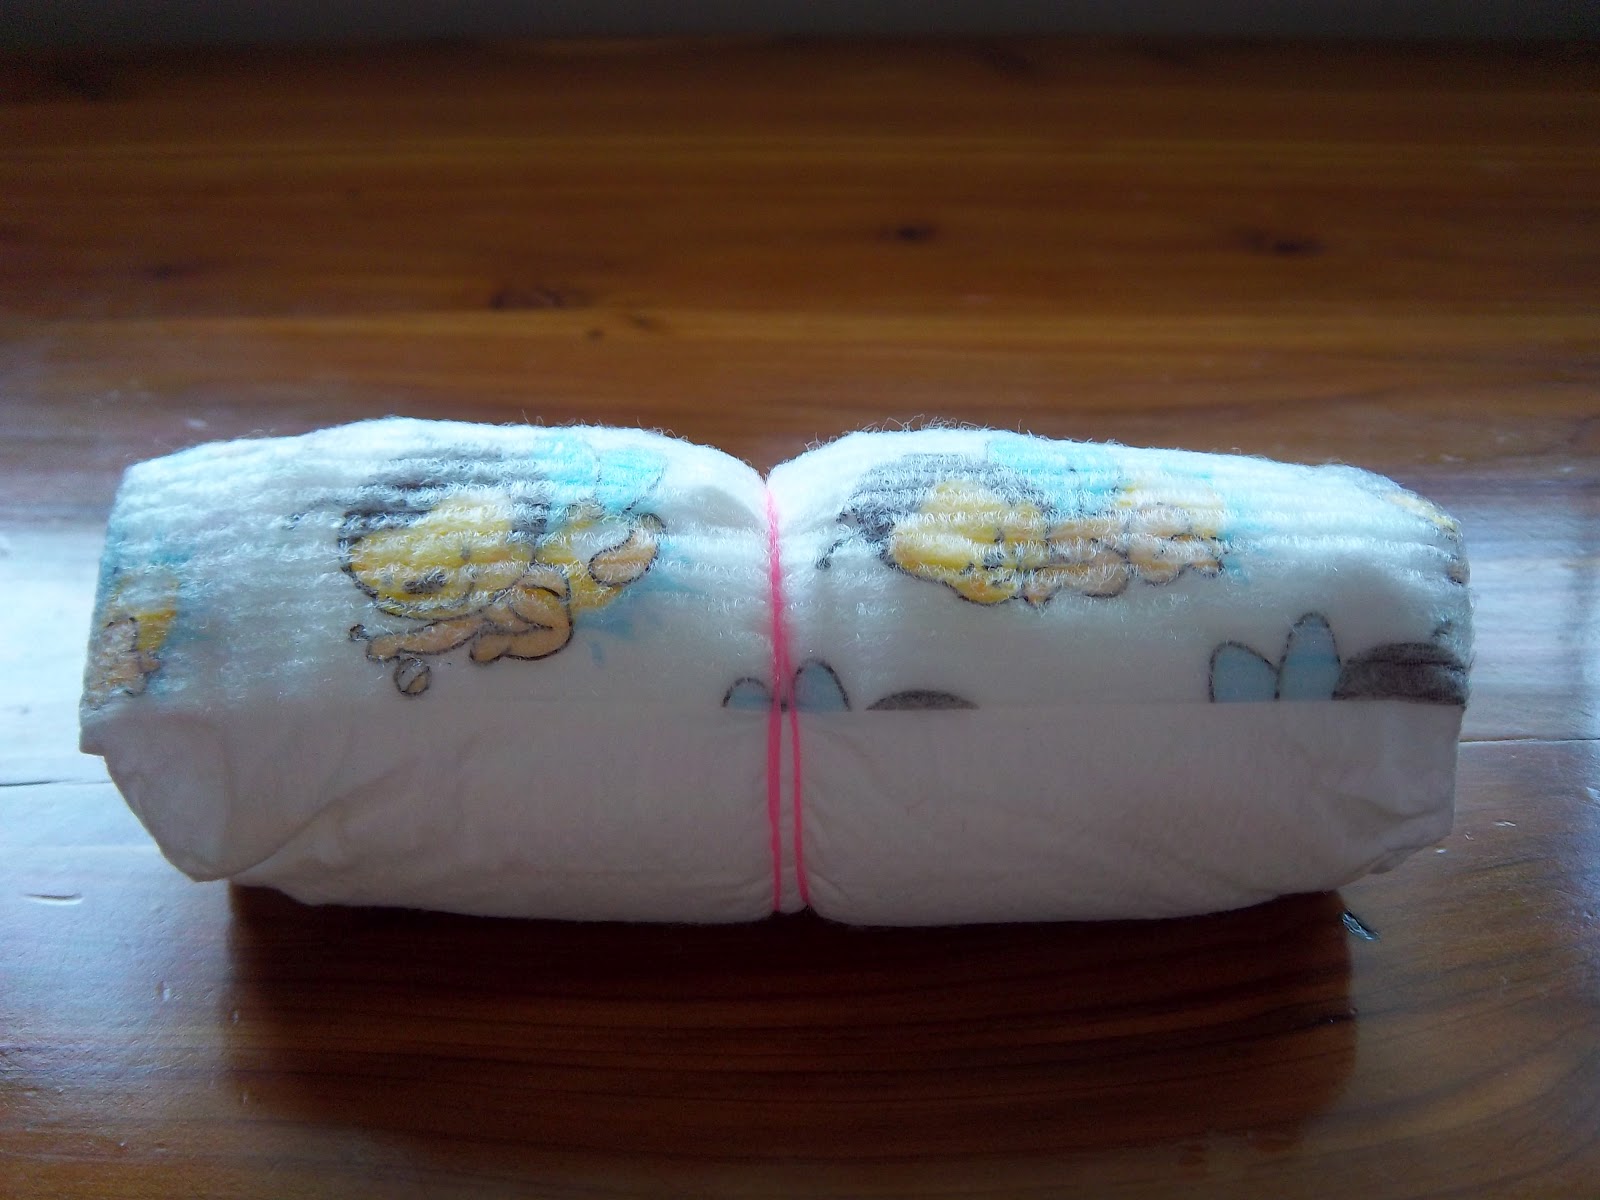
1. Roll the diapers and place a rubber band around the middle of the diaper. Put a large rubber band around the biggest can for the base of the cake.

Slide the diapers in between the can and the rubber band. Do this twice to make two layers. Place the lid on the can.

3. For the second layer put a large rubber band on your second largest can (I used a frosting container). Slide the diapers in between the can and the rubber band. Place the lid on the can.
4. Put a normal rubber band on the bottle. Slide the remaining diapers in between the bottle and the rubber band.
5. If you would like you can fill the cans with fun things for Mom and baby, and then stack the cake.
6. Decorate with ribbons by using double sided tape. If you want to make it extra secure. Put a push pin in the back to hold the ribbon. Just make sure tell the mom to remove the pins when she uses the diapers.
For some fun variations you can put a stuffed animal on stop and instead of ribbons you can decorate with circles or silk flowers. Use your imagination and have fun!
No comments:
Post a Comment
Note: Only a member of this blog may post a comment.