My Little Pony Cake!


My daughter wanted a My Little Pony cake, so I searched for an easy way to give her the cake she wanted.  I received a house shaped cake pan made by Wilton for Christmas.  It was perfect to make the village.  One cake mix makes four small houses.  I just piped around the outlines created by the cake pan when the cakes cooled.  Then, I printed off a picture of My Little Ponies and cut them out.  My daughter loved her Ponyville cake!

Vintage Transportation Quilt!


I made this fun quilt for my nephew.  I wanted to go with a 1920’s “Grand Tour” transportation theme.  


I found these cute vintage coloring pages and traced them on 10 " squares of muslin and stitched them with blue embroidery floss.


Then, I bordered the squares with red fabric and trimmed them to 12".   

 Next, I found an easy star pattern that measured 12".  This was a fun quilt to make.  


Happy Quilting!


Quilted Tablet Cover!


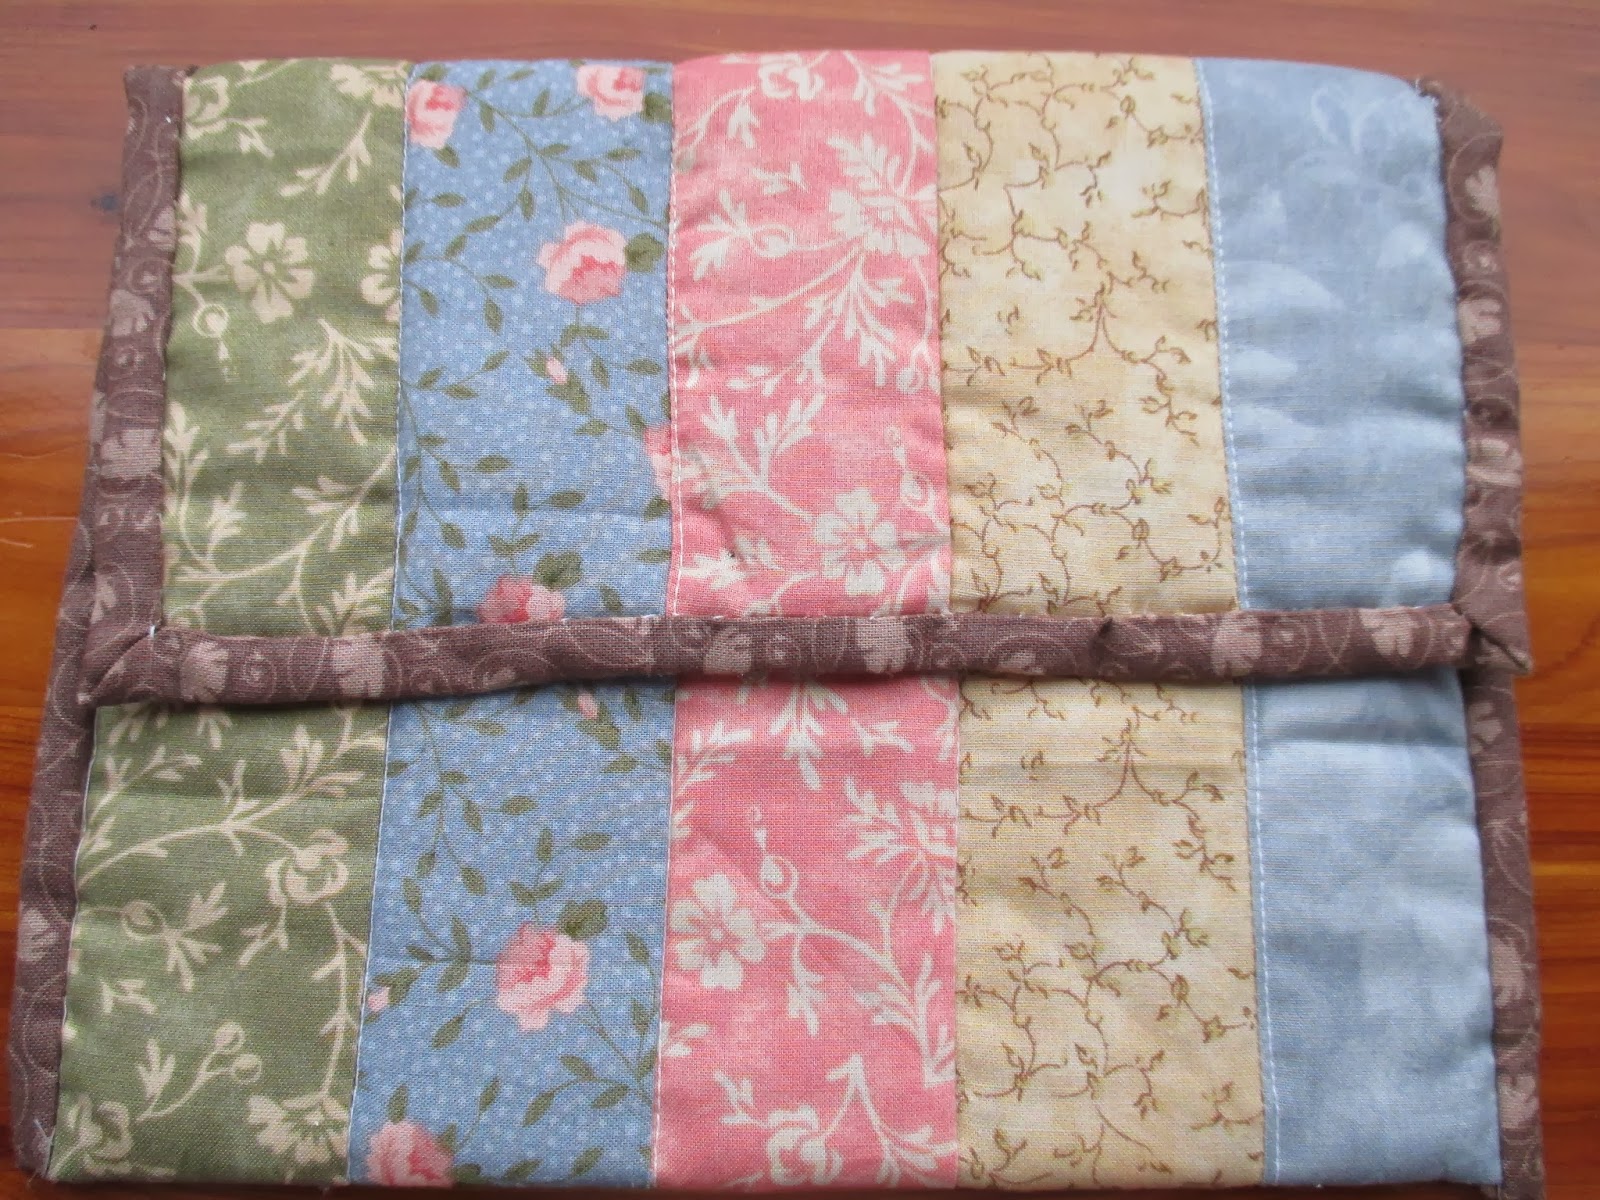
I wanted to bring my kindle with me to use some of the apps on the go, but I did not want to scratch the screen in my purse. This desire sent me to my fabric stash. 

I found these cute fabric quarters, given to me by my sister.  Thanks sis!  It was fun to make this quilted cover for my kindle.  You can make a cover for any tablet by following these instructions.  First measure the width and length of your tablet.  

Then, cut out enough 2” strips to cover the width of my kindle.  Make sure you have at least a ¼” overlapping on either side.  For the length make sure your strips of fabric are long enough to cover the top of your tablet with again ¼” overlapping. 

Next, sew the strips together and iron flat.  

Layer the sewn strips with batting and a backing fabric of your choice.  Quilt. 

Bind the top of the fabric. Then, fold over.  Sew.  


Bind around all the unfinished edges.  

I used Velcro to hold the top down.  You could use snap or button and loop, too.  Enjoy your new cover!

Jean Minions!


 Up-cycle old jeans into these cute Minions.  My kids seem to have a never ending supply of hole in the knee jeans.  I thought it would be fun to use them to make Minions.  

I just cut around the pockets of their old jeans about ½”.  

Then, going to my stash I found the other materials to build the Minions. Such as the arms and legs.

 I added the facial details with a black permanent marker. 

It is fun to dig into your stash and see what comes out! 
Have fun sewing.

Make your own action figures!


One lazy summer afternoon my son decided to make some new action figure toys out of toilet paper roll tubes.  


He measured a piece of computer paper so it would fit the height and width of the roll.  Then he laid it out and drew and colored his favorite minion.  He then taped it to the toilet paper roll. 


Now he had a new action figure to play with.  He is now collecting paper roll tubes to make more characters.  If your children don’t want to draw their own characters you can use a coloring page of their favorite character instead.  Simply color and then cut out the character and tape it onto the roll so it will stand.  

Halloween Fun!


Make your Halloween Party Spooky fun with canvas paintings. My son’s birthday is the day before Halloween so we decided to throw him a spooky Party.  My sister found these great Halloween designs from the Pottery Barn, but since I was working on a budget she re-produced them by painting on canvas.  They turned out great and were a fraction of the cost!  

We made bean bags out of Halloween print fabric for the pumpkin toss.   


The kids loved putting their hands in the spooky lab and had to guess what they were touching.  If you want to re-create this game here are some ideas for the different items:

  Food item-              Non Food item-

Fingers:       Pretzel Rods         Sticks

Brains:      Marshmallows          Cotton Balls

Worms:    Gummy Worms         Cooked Spaghetti noodles

Eyeballs:   Sour Cherry Candy  Marbles

Have fun being creative!


Pinwheel Quilting Fun!


 I love making pinwheel quilts for baby gifts.  I like to sew together 9 12” squares for my quilts.  I picked a really cute flannel print and used that for 4 of my squares and then the other 5 other squares I used a fun pinwheel pattern.  This is my favorite website that teaches you how to make pinwheels. http://www.youcanmakethis.com/articles/post/how-to-make-3-d-pinwheels.htm
They say to use 3 ½” squares, however you can make your squares any size.  

In this quilt my pinwheels are 4” and then I added a red and yellow border to make a 12” square.

From Purse to Pillow!


 This beautiful chevron purse turns into a pillow cover!  The secret is in the straps.   Key rings are used to hold on the straps.  When you want to use it as a pillow cover, simply take off the straps.

 Now slide ribbon into the key rings.  Slid in your pillow and tie the ribbons together.
  

 Make each side of your purse out of different patterns gives you two color choices for your pillow!

Crook Neck Squash Bread!


I have baked, fried, and buttered my crook neck squash and it still keeps coming!  I needed a new way to cook my squash and hopefully get my kids to still eat it.

This bread, a mix between Amish cinnamon bread and zucchini bread was the perfect combination.  My kids loved to eat it and did not realize they were still eating their vegetables.   The use of sour cream makes this bread super moist and as an added bonus it is half the calories.

1 1/4 cups of sugar (divided)
1 t cinnamon
2 eggs
¾ cup of fat free sour cream
1/3 cup of canola oil
1 t vanilla
3 cups of shredded squash
2 cups of flour
1 ½ t baking soda
½ t salt

Preheat oven to 350 degrees.  Grease and flour two bread pans.  In a small bowl combine 1/4 cup of sugar and cinnamon.  Set aside to use later.  In a large mixing bowl combine all the remaining ingredients and mix with a spoon till blended.  Pour evenly into both pans.  Sprinkle cinnamon and sugar mixture evenly over the batter in both pans.  Using a butter knife, swirl in the cinnamon and sugar into the batter.    Cook for 50 minutes or till a toothpick comes out clean.  Let rest for 10 minutes and then dump out onto a wire rack to finish cooling.


 **You could substitute zucchini or carrots for this bread.


Vintage Children On Parade Quilt!


 IF you are looking for a fun mother’s day gift, this quilt is a fun idea.  Each one of the kids holding a flag represents a grandchild.


 I used a boy and girl embroidery pattern that I found online and then changed them a bit to fit into the quilt.  For future grandchildren I plan on adding a second row with vintage kids playing instruments, pulling wagons, or crawling to join in the parade.  Have fun creating your own grand kids quilt!